

What is Soil Testing and Why is it Essential for Garden Success?
Soil testing is the scientific process of analyzing soil samples to determine their nutrient content, pH balance, organic matter levels, and overall composition. This fundamental practice provides critical insights into your soil’s health, enabling gardeners, landscapers, and property owners to make data-driven decisions for optimal plant growth and landscape management.
The Science Behind Soil Testing
Professional soil testing evaluates several crucial components:
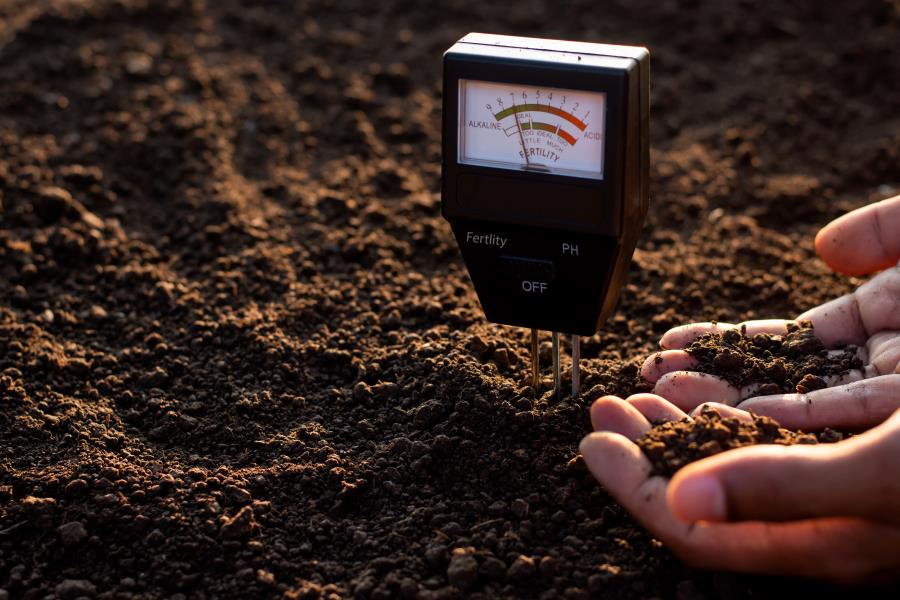
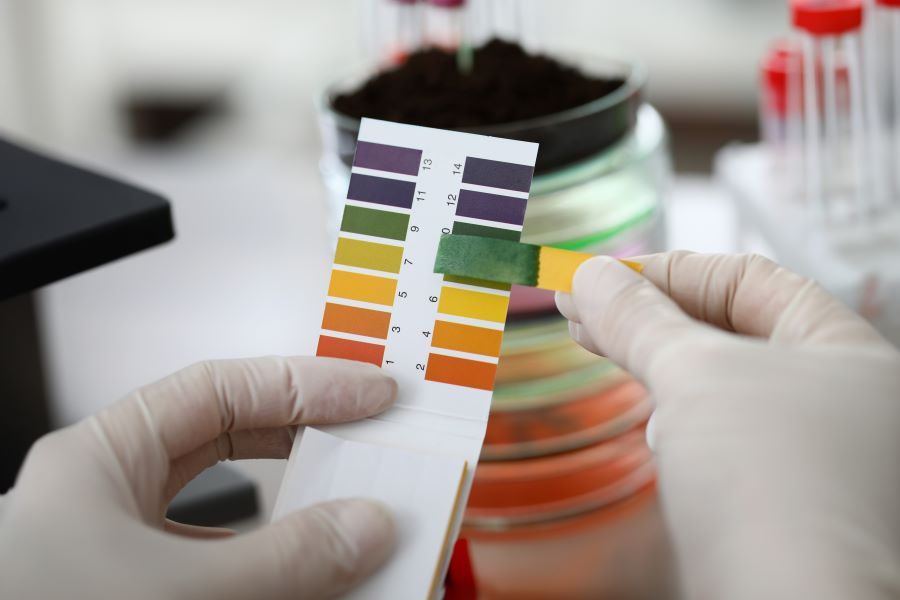
- pH levels (ranging from 0-14), which directly impact nutrient availability and plant absorption
- Macronutrient concentrations including nitrogen (N), phosphorus (P), and potassium (K)—the primary “NPK” nutrients plants need in large quantities
- Secondary nutrients like calcium, magnesium, and sulfur that support vital plant functions
- Micronutrients such as iron, manganese, zinc, copper, boron, and molybdenum needed in smaller amounts
- Organic matter content that affects soil structure, water retention, and microbial activity
- Soil texture (percentages of sand, silt, and clay) determining drainage and root development potential
- Cation exchange capacity (CEC) indicating the soil’s ability to hold and release nutrients
By understanding these elements, you can create tailored soil improvement strategies that address your garden’s specific needs rather than applying generic treatments that might waste resources or even harm plant health.
Key Benefits of Soil Testing for Robust Plant Growth

Investing in regular soil testing delivers numerous advantages that extend well beyond basic plant care, contributing to long-term soil health, environmental sustainability, and gardening success.
Identify and Correct Nutrient Deficiencies
Comprehensive soil testing:
- Precisely identifies which specific nutrients are lacking in your soil
- Reveals nutrient imbalances that may cause plant stress or disease
- Prevents wasteful application of unnecessary fertilizers
- Helps diagnose mysterious plant problems related to soil chemistry
- Creates a baseline measurement for tracking improvements over time
For example, yellowing leaves might indicate nitrogen deficiency, while purple leaves could signal phosphorus problems. Instead of guessing, soil testing provides definitive answers.
Optimize Fertilizer Selection and Application
With accurate soil test results, you can:
- Select the exact fertilizer formulation your garden needs
- Apply precisely the correct amount—no more, no less
- Time applications for maximum nutrient uptake efficiency
- Reduce environmental impact from excess fertilizer runoff
- Save money by avoiding unnecessary products and applications
This targeted approach not only improves plant performance but also protects local waterways from nutrient pollution caused by fertilizer overuse.
Enhance Soil Structure and Water Management
Soil testing guides improvements to your soil’s physical properties:
- Reveals compaction issues requiring aeration
- Identifies opportunities to improve drainage in clay soils
- Helps sandy soils retain more moisture and nutrients
- Determines optimal organic matter additions for your soil type
- Guides irrigation practices based on your soil’s water-holding capacity
These structural improvements create an optimal root environment that allows plants to access water and nutrients efficiently.
Promote Sustainable, Eco-Friendly Gardening Practices
Knowledge-based soil management leads to:
- Reduced reliance on synthetic chemicals and fertilizers
- Lower environmental impact through precise resource application
- Improved carbon sequestration through healthy soil biology
- Enhanced natural resilience against pests and diseases
- Long-term soil fertility without dependency on constant inputs
Soil testing is the cornerstone of regenerative gardening approaches that build soil health while producing abundant plant growth.
How to Perform Effective Soil Testing
Conducting soil testing can be approached in different ways depending on your needs, budget, and the level of detail required.
DIY vs. Professional Soil Testing: Making the Right Choice
DIY Soil Testing Options:
- Home test kits ($15-50): Provide basic pH and NPK measurements
- Digital soil probes ($30-150): Offer instant readings of moisture, pH, and sometimes nutrients
- Smartphone-connected sensors ($50-300): Sync results with apps for tracking and recommendations
Professional Laboratory Testing Services:
- Basic tests ($15-50): Measure pH, major nutrients, and basic recommendations
- Comprehensive tests ($50-150): Include detailed nutrient analysis, micronutrients, and organic matter
- Specialized tests ($100-300+): Evaluate soil biology, contaminants, or specific crop requirements
Choose professional testing when:
- Starting a new garden or making major landscape changes
- Experiencing persistent plant problems despite basic interventions
- Growing specialty crops with specific soil requirements
- Suspecting soil contamination or toxicity issues
- Needing highly accurate measurements for commercial production
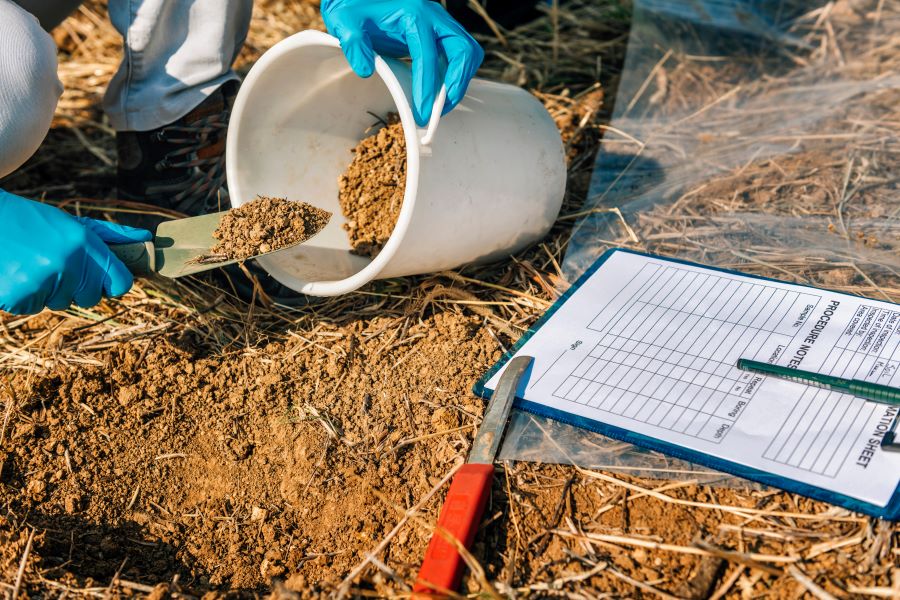
Collecting Representative Soil Samples: Best Practices
To ensure accurate results:
- Gather the right tools:
- Clean plastic bucket (metal containers can affect results)
- Garden trowel or soil probe
- Clean plastic bags or containers provided by testing lab
- Permanent marker for labeling samples
- Soil sample submission forms
- Follow proper sampling technique:
- Sample when soil is moist but not wet
- Remove surface debris and vegetation
- Dig 6-8 inches deep for gardens (3-4 inches for lawns)
- Take 5-10 subsamples from each distinct garden area
- Mix subsamples thoroughly in the bucket before packaging
- Sample different areas separately:
- Vegetable gardens
- Flower beds
- Lawn areas
- Problem spots showing plant stress
- Areas with different soil types or drainage patterns
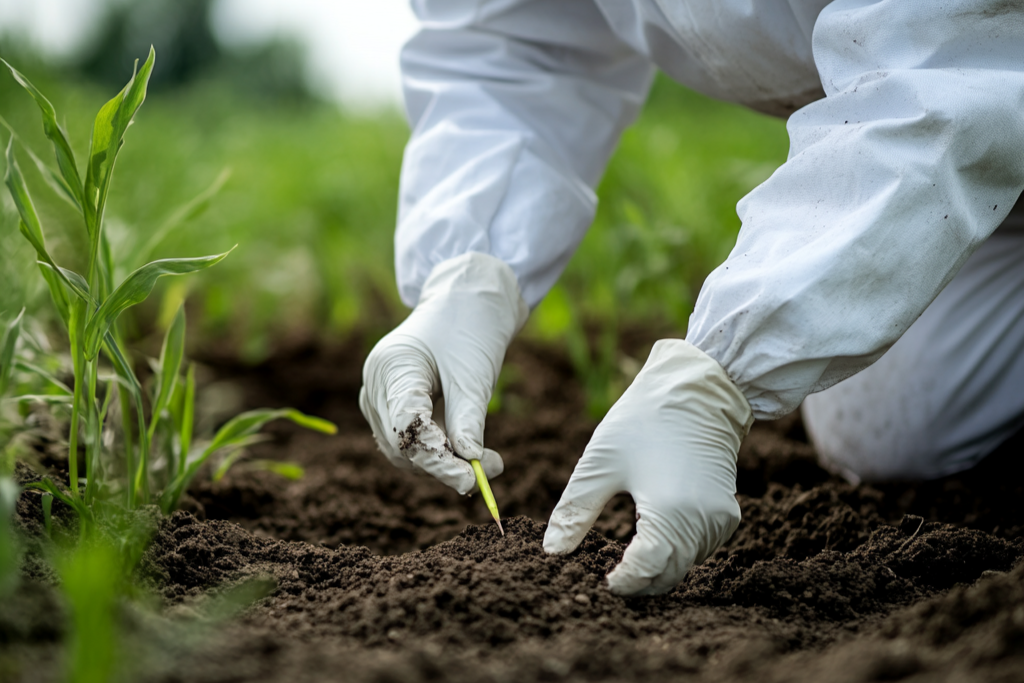
- Avoid contamination:
- Use clean tools between different sampling areas
- Don’t touch soil with bare hands
- Keep samples away from fertilizers or chemicals
- Label and document:
- Mark each sample with location and date
- Note current plants and any issues observed
- Record recent amendments or treatments
Interpreting Soil Test Results: Turning Data into Action
When you receive your soil test report:
- Start with pH analysis:
- Most plants thrive in the 6.0-7.0 range
- Acid-loving plants (like blueberries) prefer 4.5-5.5
- Alkaline-tolerant plants (like lavender) can handle 7.0-8.0
- Evaluate macronutrient levels:
- Nitrogen (N): Drives leafy growth and green color
- Phosphorus (P): Supports root development and flowering
- Potassium (K): Enhances overall plant vigor and stress resistance
- Check secondary nutrients and micronutrients:
- Look for deficiencies that might limit plant performance
- Note excessive levels that could create antagonistic relationships
- Review organic matter percentage:
- 3-5% is ideal for most garden soils
- Higher percentages improve water retention and nutrient cycling
- Examine recommendations provided:
- Specific amendment suggestions (lime, sulfur, etc.)
- Fertilizer recommendations with application rates
- Cover crop or rotation suggestions
Understanding and Acting on Soil Test Results
Once you’ve received and reviewed your soil test results, it’s time to develop an improvement strategy.
Optimizing Soil pH: The Foundation of Nutrient Availability
Addressing Acidic Soil (pH below 6.0):
- Apply agricultural limestone (calcium carbonate) to raise pH
- Use dolomitic lime if magnesium is also deficient
- Incorporate lime in fall for maximum effectiveness
- Apply at rates recommended in your soil test (typically 5-50 lbs. per 1,000 sq. ft.)
- Retest after 3-6 months to monitor changes
Managing Alkaline Soil (pH above 7.5):
- Add elemental sulfur to gradually lower pH
- Use aluminum sulfate for faster (but more drastic) pH reduction
- Incorporate acidic organic matter like pine needles or coffee grounds
- Consider gypsum (calcium sulfate) to improve soil structure without changing pH
- Select alkaline-tolerant plants for persistently high-pH areas
Balancing Nutrients for Optimal Plant Health
Addressing Major Nutrient Deficiencies:
- Nitrogen (N): Add compost, blood meal, fish emulsion, or balanced organic fertilizers
- Phosphorus (P): Incorporate bone meal, rock phosphate, or fish bone meal
- Potassium (K): Use greensand, sulfate of potash, or wood ash (which also raises pH)
Correcting Micronutrient Issues:
- Iron: Apply iron sulfate or chelated iron (especially for alkaline soils)
- Magnesium: Add Epsom salts or dolomitic lime (if pH is low)
- Calcium: Incorporate gypsum (calcium sulfate) if pH is adequate
- Boron: Use very small amounts of borax (excessive application is toxic)
- Zinc and Manganese: Apply sulfates of these nutrients as recommended
Enhancing Soil Structure and Microbial Activity
To improve your soil’s physical properties and biological health:
- Add diverse organic matter:
- Finished compost (1-3 inches annually)
- Aged manure from herbivores (avoid fresh manure)
- Leaf mold or shredded leaves
- Cover crop residues
- Implement mulching strategies:
- Maintain 2-3 inches of organic mulch
- Use wood chips in perennial beds
- Apply straw or leaf mulch in vegetable gardens
- Allow mulch to gradually decompose into soil
- Minimize soil disturbance:
- Adopt no-till or low-till practices where possible
- Use broadforks instead of rotary tillers
- Create permanent garden beds and pathways
- Support soil biology:
- Apply compost tea or microbial inoculants
- Minimize synthetic pesticide use
- Keep soil covered with plants or mulch
- Maintain diverse plantings to support mycorrhizal networks
When and How Often to Test Your Soil
Establishing a regular soil testing schedule ensures ongoing soil health and prevents nutrient imbalances before they affect plant growth.
Seasonal Recommendations for Optimal Testing
Best times for soil testing:
- Fall (ideal): Allows amendments to integrate before spring planting
- Early spring: Provides guidance for pre-planting fertilization
- Midseason: Helps diagnose emerging plant problems
- Post-harvest: Identifies needs before winter cover cropping
Avoid testing:
- Immediately after fertilizer application
- During extremely wet or dry conditions
- When soil is frozen or waterlogged
Long-Term Monitoring and Soil Health Tracking
For comprehensive soil management:
- Test new gardens before planting
- Retest established gardens every 2-3 years
- Monitor problem areas annually until resolved
- Keep detailed records of test results and amendments
- Track changes in pH, organic matter, and key nutrients over time
- Photograph plant growth to correlate with soil improvements
- Consider occasional specialized tests for soil biology or contaminants
Advanced Soil Testing Considerations for Specific Situations
Testing for Urban and Potentially Contaminated Soils
Urban gardens may require specialized testing for:
- Heavy metals (lead, arsenic, cadmium)
- Petroleum residues
- Industrial contaminants
- Road salt accumulation
If contamination is detected:
- Build raised beds with imported clean soil
- Use deep mulch systems to minimize soil contact
- Focus on ornamental rather than edible plants
- Consider phytoremediation with specific plants
- Consult environmental specialists for remediation options
Specialized Testing for Organic and Sustainable Gardens
For organic growing systems, consider:
- Soil biological activity assessments
- Compost quality testing
- Humus content evaluation
- Soil respiration measurements
- Earthworm population counts
- Mycorrhizal colonization analysis
These advanced metrics provide insights into the living aspects of soil that support plant health beyond basic chemistry.
Conclusion: Investing in Soil Testing for Gardening Success
Soil testing is far more than a scientific procedure—it’s the foundation of sustainable, thriving landscapes and productive gardens. By understanding your soil’s unique composition and making data-driven decisions, you can:
- Enhance plant vigor, flowering, and fruiting
- Prevent nutrient imbalances before they cause problems
- Reduce gardening costs through efficient resource use
- Build long-term soil fertility naturally
- Create resilient landscapes that withstand environmental stresses
- Contribute to environmental health beyond your garden boundaries
Whether you’re maintaining a small urban garden or managing extensive landscapes, regular soil testing provides the roadmap for success. Start by establishing your soil’s baseline with a comprehensive test, then implement targeted improvements based on the results. With every season of informed care, your soil—and the plants it supports—will reach new levels of health and productivity.
Remember that healthy soil is a living ecosystem, not just a growing medium. By nurturing this complex underground world through science-based practices, you create the conditions for truly exceptional plant growth and sustainable garden success for years to come.