Trail Cams: A Step-by-Step Guide on How to Set Them Up in 2025
Introduction
Trail cams , also called game cameras, are fantastic for anyone who loves observing wildlife, tracking game, or keeping an eye on their property. A well-set trail cam can provide incredible insights into the natural world—capturing high-quality images and videos of animals in their natural habitats. At Arborist Now, we know how crucial it is to get your setup right from the start. That’s why we’ve put together this practical guide to ensure you’re getting the best results from your trail cam, whether you’re spotting deer at dawn, tracking nocturnal visitors , or safeguarding your land.
Trail cams aren’t just about mounting a camera in the wilderness and hoping for the best. It’s all about finding the perfect spot, understanding your target, and tweaking your settings to ensure you capture the action with clarity. In this guide, we’ll cover everything you need to know—from choosing the right location to troubleshooting common issues—so you can confidently set up your trail cam like a pro and enjoy the thrill of capturing the great outdoors in stunning detail!
What is a Trail Cam and Why Use One?

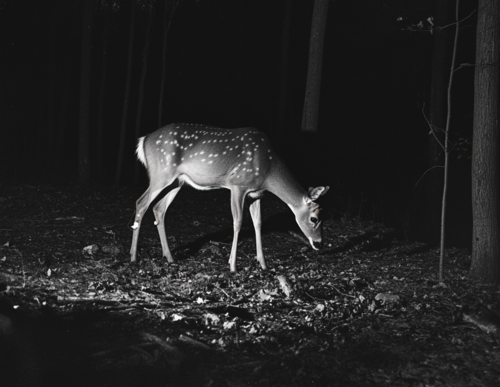
Capturing Wildlife: Nighttime Activity of a Deer in a Forest
Trail cams are specialized cameras designed for outdoor use, perfect for capturing footage of wildlife, monitoring game, or keeping an eye on remote areas. They come equipped with features like motion sensors, infrared lights, and time-lapse capabilities to capture everything from a curious fox to a passing deer. Here’s a closer look at the main reasons people use trail cams:
1. Wildlife Observation
Trail cams are invaluable for observing wildlife without disturbing their natural behavior. Whether you’re a bird watcher, a nature lover, or a wildlife researcher, a well-placed camera can give you a front-row seat to the hidden world of animals.
2. Hunting
For hunters, trail cams are a game changer. These cameras help you track game movement, learn animal habits, and plan your hunts with greater precision. No more guessing—trail cams provide the data you need to increase your success.
3. Security
Trail cams aren’t just for wildlife—they’re great for security, too. Use them to monitor remote properties, barns, cabins, or backyard areas. Many models even offer night vision, motion detection, and wireless connectivity, so you can keep an eye on things no matter the time of day.
Today’s trail cams are packed with features, from high-resolution images to mobile alerts, making them versatile and reliable for all outdoor enthusiasts.
Choosing the Right Location for Your Trail Cam
Location is everything when it comes to getting great results with your trail cam. Here’s what you need to keep in mind to pick the perfect spot:
1. Know Your Target
To capture the best footage, it’s crucial to understand the habits of the animals you’re interested in. Look for:- Game Trails: Animals tend to follow well-worn paths, especially larger species like deer. Search for tracks and beaten-down grass.
- Water Sources: Streams, ponds, and lakes are magnets for all sorts of wildlife. Setting up near water boosts your chances of getting diverse footage.
- Feeding Areas: Focus on spots with natural food sources like berry bushes or oak trees. Animals will frequently return to places with a steady food supply.
2. Signs of Wildlife Activity
Identify the best locations by looking for signs of animals:- Tracks: Fresh prints on soft ground or mud.
- Scat: Animal droppings can indicate species and activity levels.
- Rubs and Scrapes: Marks left on trees or the ground can hint at a specific animal’s territory.
3. Optimal Positioning Tips
- Height: Position your camera about 2-3 feet off the ground for deer. Go lower for smaller animals or higher for larger game.
- Direction: Avoid facing the camera east or west to prevent sun glare. North-facing setups often work best.
- Angle: Aim for a slight downward angle to capture movement without missing animals up close.
4. Avoiding Common Mistakes
- Don’t place the camera too close to a trail, or you might miss fast-moving animals.
- Avoid reflective surfaces like water, which can trigger false alarms.
5. Legal Considerations
Before setting up your trail camera in the San Francisco area, you need to be aware of important legal requirements :
- Private Property: Written permission is required before placing trail cameras on any private property in California.
- Military Property: Trail cameras are strictly prohibited on all military bases and property.
- Camera Tampering: It is illegal to touch, remove, or access footage from trail cameras without the owner’s consent unless they are on your property.
- Unauthorized Cameras: If you find unauthorized cameras on your private property, contact your local wildlife officers for assistance
Always check your local wildlife laws and regulations before setting up trail cameras, since requirements can vary by location.
How to Set Up a Trail Cam: A Step-by-Step Guide

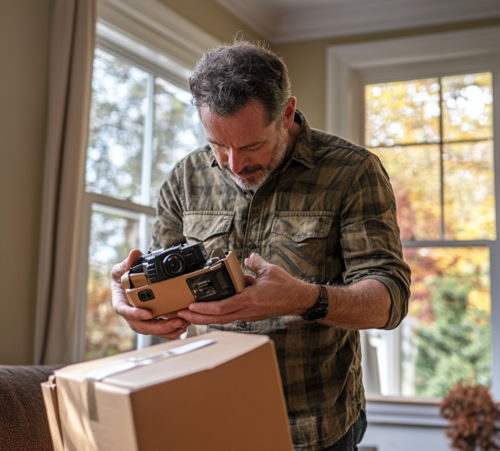
Preparing Wildlife Cameras for Outdoor Exploration
Ready to set up your trail cam? Follow these simple steps for a hassle-free experience:
1. Unbox and Familiarize Yourself
Take a moment to get familiar with your camera. Each model has unique features, so spend a few minutes reviewing the user manual. Identify the key parts:
- Battery compartment
- SD card slot
- Control panel for settings
- Mounting brackets or straps
2. Secure the Camera
- Choose a sturdy tree, fence post, or mount to anchor the camera.
- Strap it tightly to prevent movement from wind or animals.
- Double-check that it’s stable to avoid blurry pictures caused by shaking.
3. Adjust the Settings
Fine-tune the camera to match your needs:
- Sensitivity: A medium setting helps balance false triggers and missed shots.
- Detection Range: Adjust for the target distance; shorter for closer observation, longer for a broader view.
- Trigger Speed: A faster trigger speed captures quick movements, ensuring you don’t miss the action.
4. Test It Out
Always do a quick test before you leave:
- Walk Test: Trigger the camera yourself to make sure it’s positioned correctly.
- Sample Photos: Check the first few images to confirm the angle and coverage are spot-on.
Optimizing Your Trail Cam’s Settings for the Best Results
1. Choosing the Right Resolution
- Higher Resolution: Ideal for capturing detailed images or for when you need to zoom in.
- Lower Resolution: Saves storage space and is great for basic monitoring.
2. Setting Up Photo Burst and Video Length
- Photo Burst: 3-5 shot bursts help ensure that you don’t miss fast-moving animals.
- Video Length: Short clips (10-20 seconds) conserve battery while providing enough footage.
3. Making the Most of Infrared and Motion Sensors
- Infrared Sensitivity: Adjust for clear night shots without startling animals.
- Motion Sensitivity: Tweak to avoid triggers from wind or other non-wildlife movements.
4. Maximizing Battery Life
- Use Lithium Batteries : They last longer and handle extreme temperatures well.
- Regular Checks: Ensure battery contacts are clean and tight to avoid power interruptions.
5. Best Settings for Day and Night
- Daytime: Higher resolution with moderate sensitivity for clear, detailed shots.
- Nighttime: Use a lower resolution to save battery and reduce blur in low light.
Troubleshooting Common Trail Cam Issues
Trail cams can encounter a few hiccups. Here’s how to fix the most common problems:
1. False Triggers
- Cause: Wind, moving branches, or sunlight can trigger the camera.
- Solution: Adjust sensitivity, trim nearby branches, or reposition the camera.
2. Blurry or Poor Image Quality
- Cause: Incorrect settings or low-quality components.
- Solution: Choose the right resolution, double-check focus, and clean the lens regularly.
3. Storage Problems
- Cause: Incompatible SD cards or full memory.
- Solution: Use class 10 SD cards , format them regularly, and check your camera’s specs.
4. Security Concerns
- Use lockboxes and sturdy straps to prevent theft.
- Consider camouflaging the camera to blend in with its surroundings.
- Invest in cellular cameras that send images directly to your phone for real-time monitoring.
Analyzing Your Trail Cam Footage for Better Insights

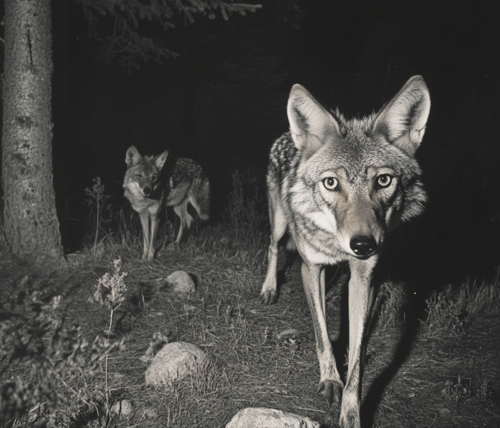
Night Vision: Coyotes Spotted on Wildlife Camera
You’ve got your footage—now it’s time to analyze it like a pro:
1. Organizing and Sorting Photos
- Save images in folders based on date or location for easy tracking.
- Use wildlife software to tag, sort, and categorize your images.
2. Identifying Patterns and Behavior
- Track when animals are most active—morning, evening, or nighttime?
- Note any repeating routes or behaviors to improve future setups.
3. Using Metadata to Fine-Tune Future Captures
- Review metadata like timestamps, weather, and temperature to learn more about animal habits.
- Adjust your camera’s placement and settings based on this data for better future results.
Maintenance Tips to Keep Your Trail Cam Working Smoothly
Taking care of your trail cam helps ensure it will last through the seasons:
1. Cleaning and Proper Storage
- Wipe down the lenses to remove dirt and moisture.
- Store in a cool, dry place when not in use to avoid damage.
2. Keep Firmware Up to Date
- Manufacturers often release firmware updates to enhance performance—check for updates regularly.
3. Seasonal Adjustments
- Use weather-resistant gear in winter.
- Make adjustments for changes in daylight and seasonal wildlife behavior.
Conclusion
Setting up a trail cam is easy when you know the right steps. With proper preparation, you can capture stunning footage of wildlife, understand game movement better, or even monitor your property from afar. At Arborist Now , we love sharing ideas about how you can enjoy the outdoors and the beautiful wildlife and critters that share in the space.
We may receive affiliate compensation for some of the links above at no cost to you if you decide to make a purchase.


